
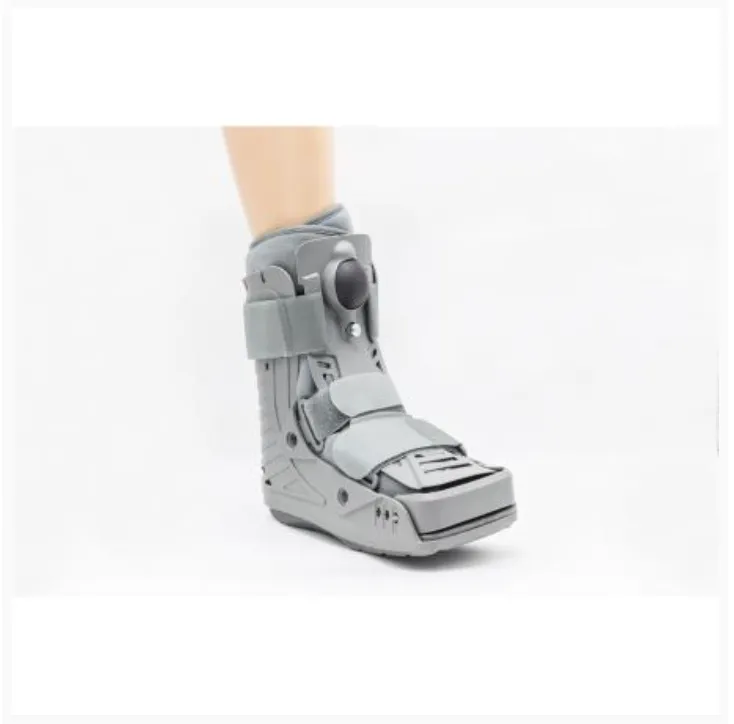
Achieving Optimal Fit and Initial Application
Proper fit is the foundation of effective recovery in a rehabilitation orthopedic walking boot. Without precise sizing and careful application, the device can compromise healing, cause secondary injuries, and delay return to function.
Anatomical assessment and precise sizing for pressure redistribution
Before applying the boot, conduct a thorough anatomical assessment: measure foot length and width, as well as calf circumference, using the manufacturer’s standardized sizing guide. The boot should snugly cradle the heel and arch—without creating pressure points—so weight transfers evenly across the sole. This minimizes peak plantar stresses that could lead to skin breakdown or discomfort. Many models offer multiple shell widths and customizable liners to accommodate anatomical variation. A correct fit allows the boot to stabilize the injured area while offloading stress onto healthier tissues, enabling extended wear without frequent strap adjustments.
Step-by-step application protocol to prevent skin breakdown and nerve compression
Follow a systematic application protocol to reduce complications. First, inspect the skin for preexisting lesions, blisters, or swelling. Apply a clean, moisture-wicking sock extending above the boot’s top edge. Position the foot fully into the liner, ensuring the heel seats firmly against the posterior wall. Tighten straps sequentially from distal to proximal—starting at the toes and moving upward—with firm but non-restrictive tension (a two-finger slip under each strap is a reliable benchmark). Avoid overtightening over the shin and Achilles tendon, where superficial nerves are especially vulnerable. After securing the boot, assess circulation via capillary refill, distal sensation, and toe color. Reassess fit daily—particularly as edema resolves—to catch early signs of pressure marks or numbness before they progress to nerve compression or tissue injury.
Mastering Gait Mechanics During Orthopedic Boot Use
Proper gait mechanics are essential when using a rehabilitation orthopedic walking boot to prevent secondary injuries and promote healing. The boot alters normal ambulation by limiting ankle motion and shifting load away from the injured limb—often onto the upper body and contralateral leg. Without deliberate retraining, patients commonly adopt compensatory patterns like hip hiking, trunk lean, or circumduction, increasing strain on the lumbar spine and unaffected joints. Clinicians must guide users through biomechanical adjustments during both non-weight bearing and partial weight bearing phases to reinforce safe, energy-efficient ambulation.
Biomechanical Adaptations for Non-Weight Bearing and Partial Weight Bearing Protocols
During non-weight bearing, the foot must remain fully suspended, with all weight borne through crutches or a walker. This demands coordinated upper-body control: controlled scapular retraction, stable elbow extension, and synchronized swing-through movement. For partial weight bearing—typically 25–50% of body weight—the boot’s rigid sole helps distribute force across the midfoot and heel. However, patients often misinterpret its cushioning as permission for uncontrolled heel strike, increasing impact on the residual limb. Physical therapists emphasize a three-point gait pattern: advance both crutches first, then simultaneously step forward with the booted foot and unaffected leg. Key adaptations include shortening stride length on the affected side, maintaining pelvic neutrality, and avoiding lateral trunk flexion. Research shows improper weight transfer during crutch-assisted gait can elevate upper-limb ground reaction forces by up to 60%, significantly raising fatigue risk and energy expenditure. Real-time feedback tools—such as bathroom scales or mirror-based visual cues—help patients calibrate loading accurately.
Integrating Physical Therapy to Reinforce Safe, Efficient Ambulation
While the boot provides structural support, physical therapy is indispensable for retraining movement patterns. Therapists prescribe targeted interventions: isometric quad sets and ankle pumps in early stages; progressing to active ROM, heel raises, and single-leg balance as tolerance improves. Gait training emphasizes symmetric step timing, equal weight shift, and controlled heel-to-toe progression despite the boot’s stiffness. Upper-body work focuses on scapular stabilization and latissimus dorsi strengthening to sustain crutch control without shoulder impingement. Core engagement drills—including planks and bird-dogs—counteract compensatory lumbar hyperextension. Integrated consistently, these elements transform guarded movement into automatic, confident, pain-free ambulation—accelerating transition to full weight bearing.
Progressive Rehabilitation Orthopedic Walking Boot Protocol
A clinically sound approach to weaning from a rehabilitation orthopedic walking boot requires a structured, phase-based protocol that prioritizes tissue healing while progressively restoring function. The goal is to transition the patient from complete immobilization to boot-free, pain-free ambulation without reinjury.
Phase 1–3 exercise progression: from immobilization to boot-free function
Phase 1 (weeks 1–4) emphasizes pain and inflammation control. The patient remains fully immobilized in the boot and performs only isometric exercises—static quad sets and gentle ankle pumps—to preserve neuromuscular activation and venous return without joint motion. Phase 2 (weeks 4–8) introduces partial weight bearing (25–50% body weight) and active range of motion. The boot may be removed for supervised sessions to perform controlled dorsiflexion and plantarflexion within pain-free limits. Phase 3 (week 8 onward) focuses on progressive resistance, dynamic balance, and functional mobility: heel raises, single-leg stance (initially with support), and closed-chain strengthening. The boot is gradually replaced by a supportive shoe, with activity progression guided by pain response, functional stability, and objective performance metrics.
Evidence-based weaning timeline, functional milestones, and reassessment criteria
An evidence-informed weaning timeline typically spans 6–12 weeks, varying by injury type, surgical intervention, and individual healing response. Key functional milestones include achieving full passive ankle ROM without pain, demonstrating symmetrical weight bearing during gait, and sustaining single-leg balance for ≥10 seconds. Reassessment should occur every 2 weeks using validated tools such as the Lower Extremity Functional Scale (LEFS) and goniometric ROM measurements. If LEFS scores remain below 80% of preinjury baseline by week 10, clinicians should consider brief re-immobilization or referral for physical therapy reassessment. This structured, milestone-driven framework reduces premature loading risks and supports personalized, safe recovery.
Preventing Complications: Skin Integrity and Infection Control
Prolonged use of a rehabilitation orthopedic walking boot increases risk for pressure ulcers and bacterial infection. A 2023 study in the Journal of Orthopaedic Trauma found that 25% of patients developed skin complications without consistent preventive care. Conduct twice-daily skin inspections—using a mirror if needed—to detect early redness or abrasions around bony prominences like the malleoli and calcaneus. Clean skin with pH-balanced soap, dry thoroughly, and apply zinc oxide barrier ointment to high-friction zones. Wear moisture-wicking socks and change them immediately if damp to prevent maceration. Disinfect boot liners daily with hospital-grade antimicrobial solution—and never share footwear. Address hotspots, discoloration, or unusual odor promptly, as untreated inflammation can delay recovery by 3–5 weeks. Adherence to these hygiene protocols reduces complication rates by 40%, according to wound care specialists.
When to Seek Clinical Intervention: Red Flags in Rehabilitation
Recognizing critical warning signs during recovery is essential to prevent setbacks. Patients should contact their provider immediately if they experience:
- Persistent or escalating pain unrelieved by rest or prescribed medication
- New or worsening numbness/tingling in the foot or toes
- Sudden swelling, redness, or warmth around the boot contact points
- Purulent drainage or foul odor from skin sites
- Fever above 100.4°F (38°C) with chills
- Inability to bear partial weight when cleared by protocol
- Skin breakdown (blisters, pressure ulcers) under straps or liners
These symptoms may signal infection, deep vein thrombosis, nerve compression, or impaired tissue healing—conditions requiring urgent evaluation. Delaying intervention risks prolonged recovery, surgical revision, or permanent functional impairment. Consistent self-monitoring paired with timely clinical assessment ensures rehabilitation remains safe, efficient, and on track.
FAQ
Q: How do I determine the correct size of a rehabilitation orthopedic walking boot?
A: Measure your foot length, width, and calf circumference using the manufacturer’s sizing guide to ensure the boot fits snugly without causing pressure points. Consult a physician or physical therapist if unsure.
Q: Can I walk normally with a walking boot?
A: The boot alters normal walking mechanics. Physical therapy can help retrain gait patterns to avoid compensatory movements and prevent secondary injuries.
Q: How often should I inspect the skin while using the boot?
A: Perform skin inspections twice daily to identify any signs of redness, blisters, or pressure points. Early detection can prevent complications such as ulcers or infections.
Q: How long should I use the walking boot?
A: The timeline varies depending on the injury and healing progress, typically lasting 6–12 weeks. Follow your physician’s protocol and transition gradually to avoid reinjury.
Q: What are common red flags indicating I need to contact my doctor?
A: Persistent pain, worsening numbness or tingling, redness, swelling, or foul odor around the boot are signs that require immediate medical attention.